16 Tiny House Camper Ideas That Maximize Space & Style
Tiny house campers prove that great things come in small packages. With a bit of creativity and smart planning, these cozy homes on wheels can be both stylish and super functional.
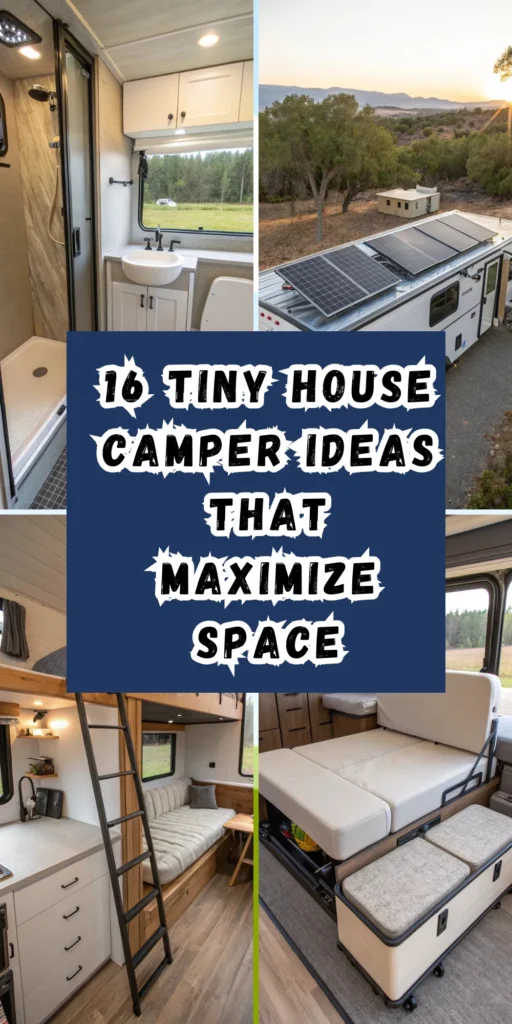
Here are 16 brilliant ideas to help you make the most of every inch.
Use Multi-Function Furniture
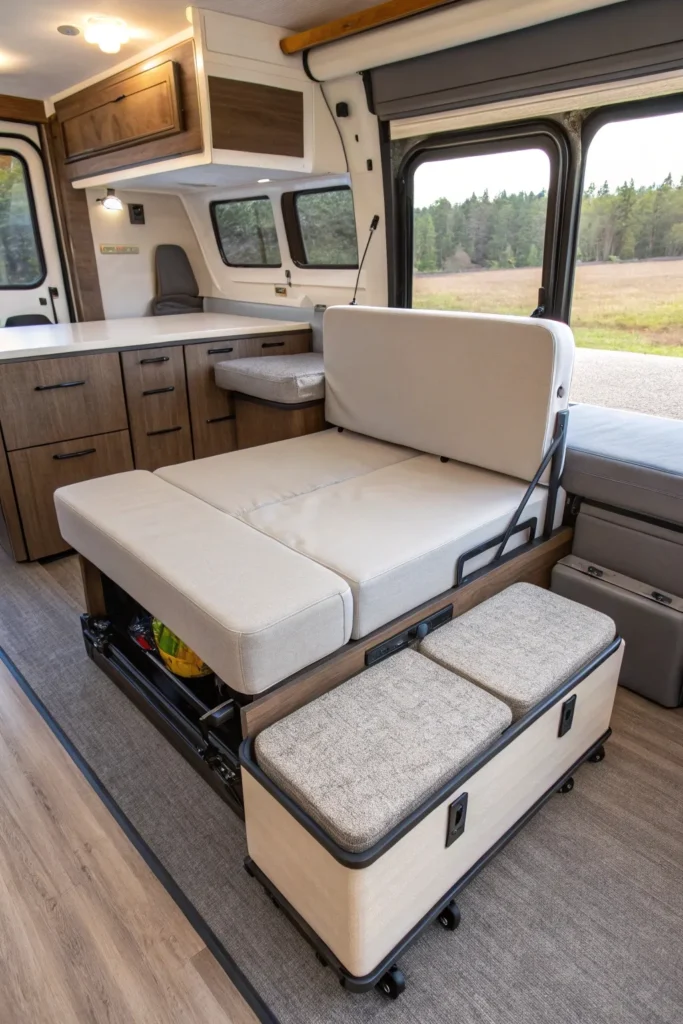
Why try this? It maximizes your limited space by letting one piece serve two or three roles—like a bed that becomes a sofa or a bench with storage.
Implementation: Choose foldable or convertible furniture designed for RVs or small spaces. Look for items with hidden compartments, such as storage ottomans or benches. Test for comfort and durability before installing.
Who benefits: Campers living full-time or anyone trying to avoid clutter in a compact layout.
Pro tip: Choose lightweight pieces with wheels or fold-down features to make rearranging easier.
Build a Loft Bed or Sleeping Platform
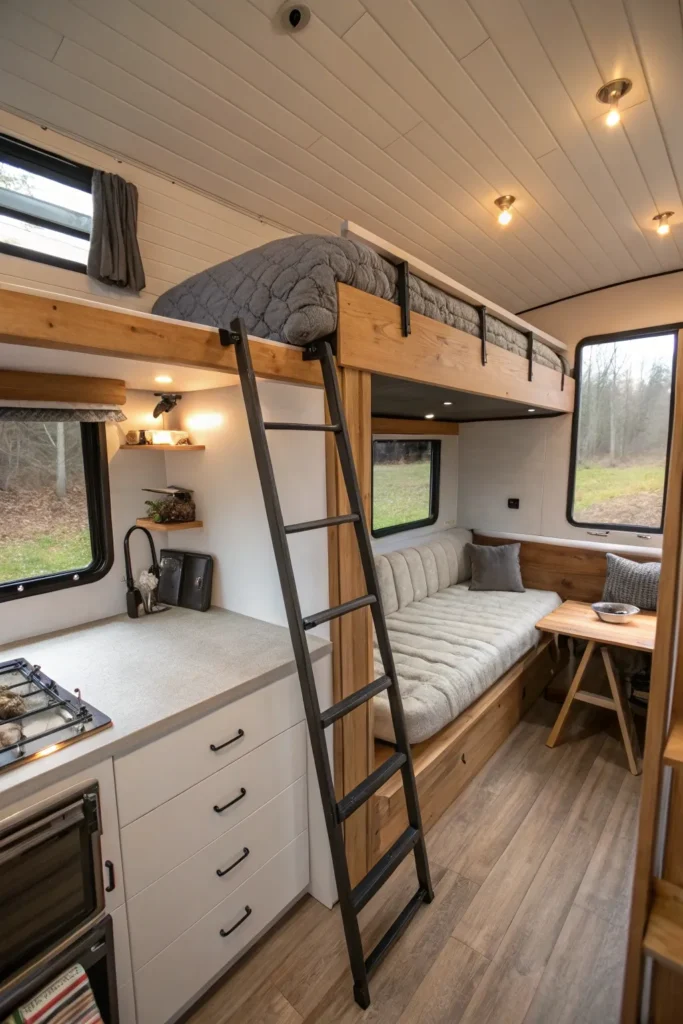
Creating a raised sleeping area instantly frees up floor space for dining, lounging, or working.
Implementation: Construct a secure platform with supportive framing. Use a mattress made for RVs or custom-cut memory foam. Add a ladder or stairs and safety rails if needed.
Best for: Solo travelers or couples looking to expand usable daytime space.
Con: Limited headroom—ideal for those who don’t mind crawling into bed.
Install a Fold-Down Table or Desk
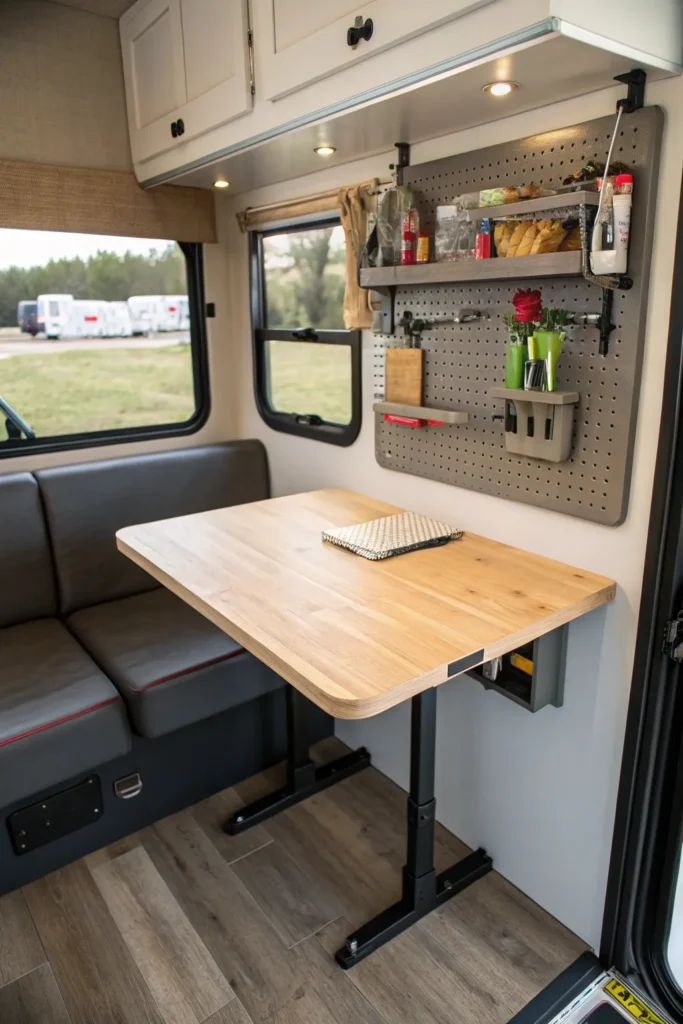
A wall-mounted table gives you a dining space or workstation when you need it—and folds out of the way when you don’t.
How to: Use sturdy wall brackets or folding hinges. Cut a lightweight wooden surface to size and paint or stain it. Anchor it securely into studs or framing.
Why it works: Gives flexible surface space without sacrificing walkways.
Pro tip: Add a pegboard or organizer above the table for tools, utensils, or supplies.
Add Under-Bed Storage
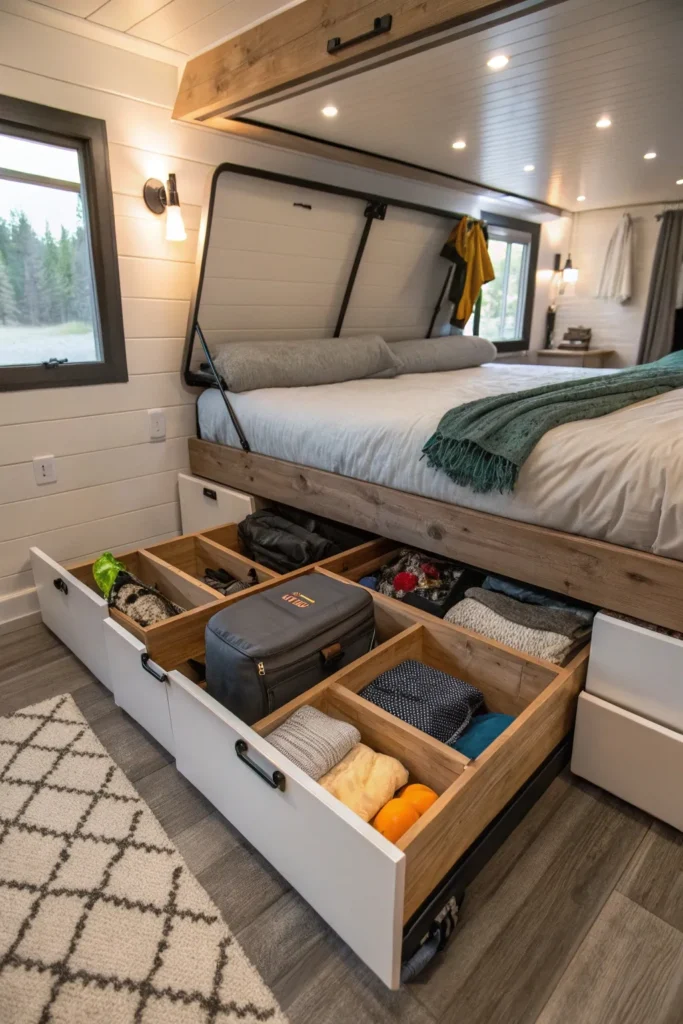
Why try this? It keeps bulky items hidden without taking up additional space—a must in tiny living.
Steps: Choose a platform bed with lift-up access or large pull-out drawers. Store bins, luggage, off-season clothing, or extra bedding inside. Use cedar blocks or sachets to keep it fresh and dry.
Who benefits: Great for weekenders or full-time travelers who rotate gear.
Downside: Accessing stored items can be awkward if the bed isn’t lift-assisted.
Add Slide-Outs (if Possible)
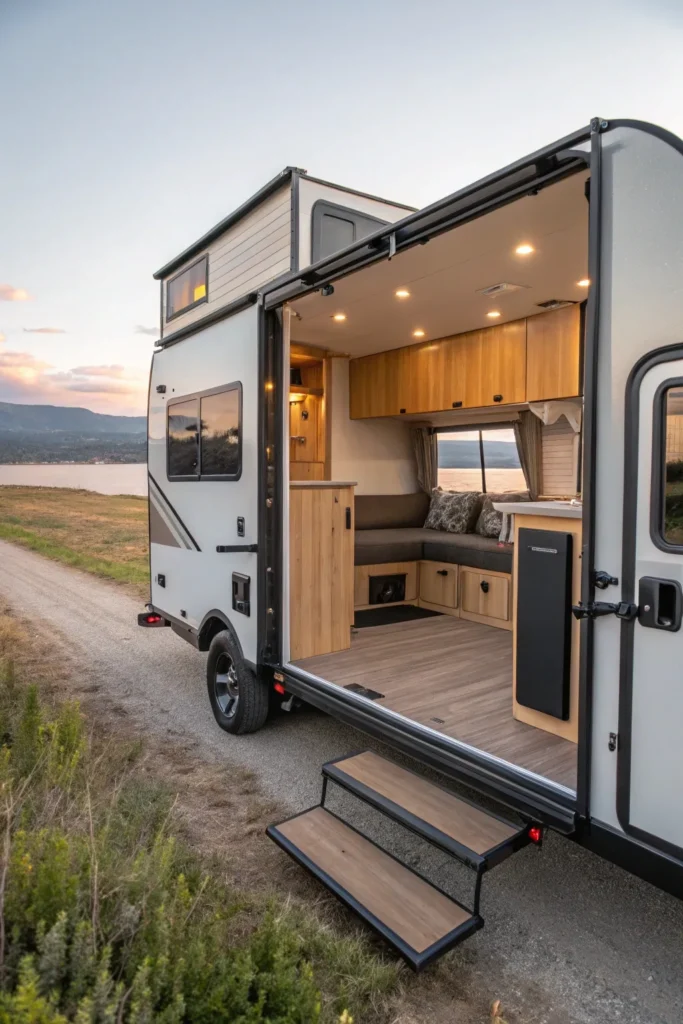
Slide-outs expand your interior space at camp without adding width during travel.
Implementation: Install during your camper build or retrofit with professional help. Popular areas to expand include dinettes, sofas, or beds. Seal edges properly to prevent water leaks.
Why it matters: Adds major livability without increasing towing weight too much.
Con: Increases complexity and cost—best for those committed to longer trips.
Choose Compact, RV-Friendly Appliances
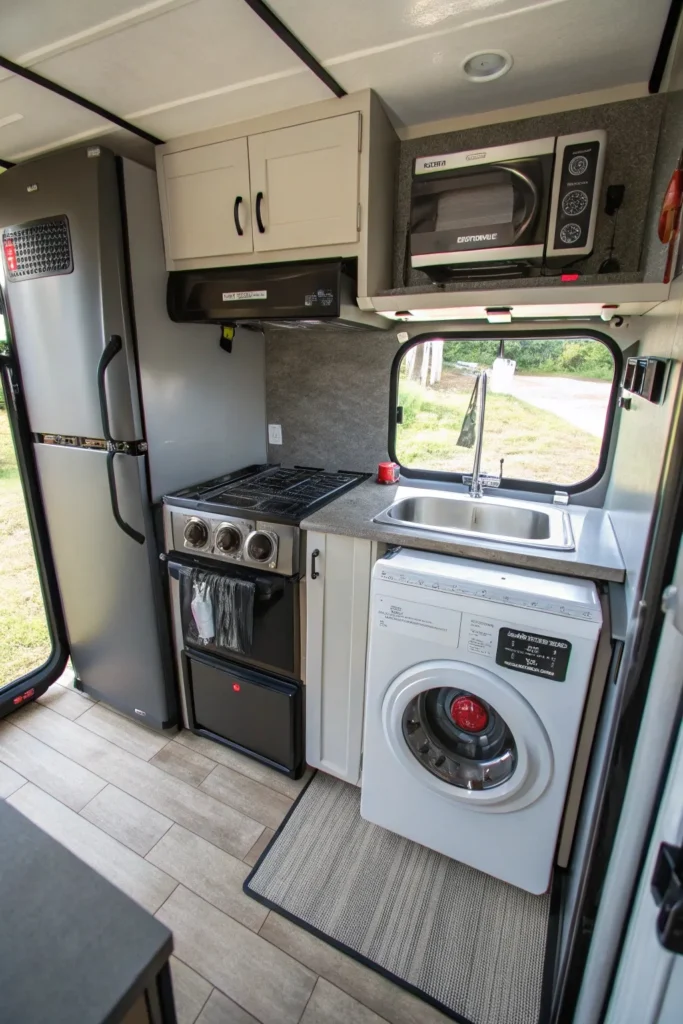
Small appliances made for campers save energy, space, and weight—all important when traveling.
Steps: Install a 2-burner stove, mini fridge, or combo washer-dryer unit. Opt for propane or 12V options when going off-grid. Place appliances near existing plumbing and electrical lines.
Best for: Campers who cook often or live on the road full-time.
Styling tip: Stainless steel and matte black finishes give a modern edge without cluttering the look.
Build Vertical Shelving for Storage
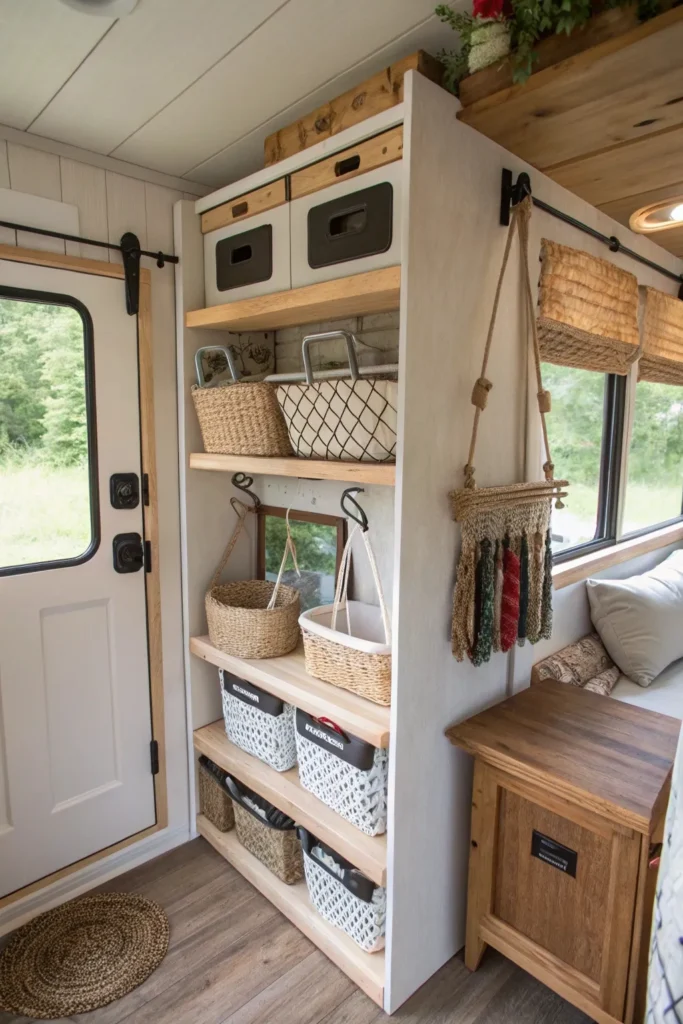
Going up—not out—helps you stay organized without wasting precious floor space.
How to: Install lightweight open shelves, cubbies, or hanging baskets. Mount storage above doors, windows, or along unused walls. Use rope nets or cabinet lips to prevent items from shifting in transit.
Why it works: Makes use of otherwise ignored vertical real estate.
Pro tip: Keep shelf décor minimal and uniform for a cleaner visual.
Use Sliding or Barn-Style Doors
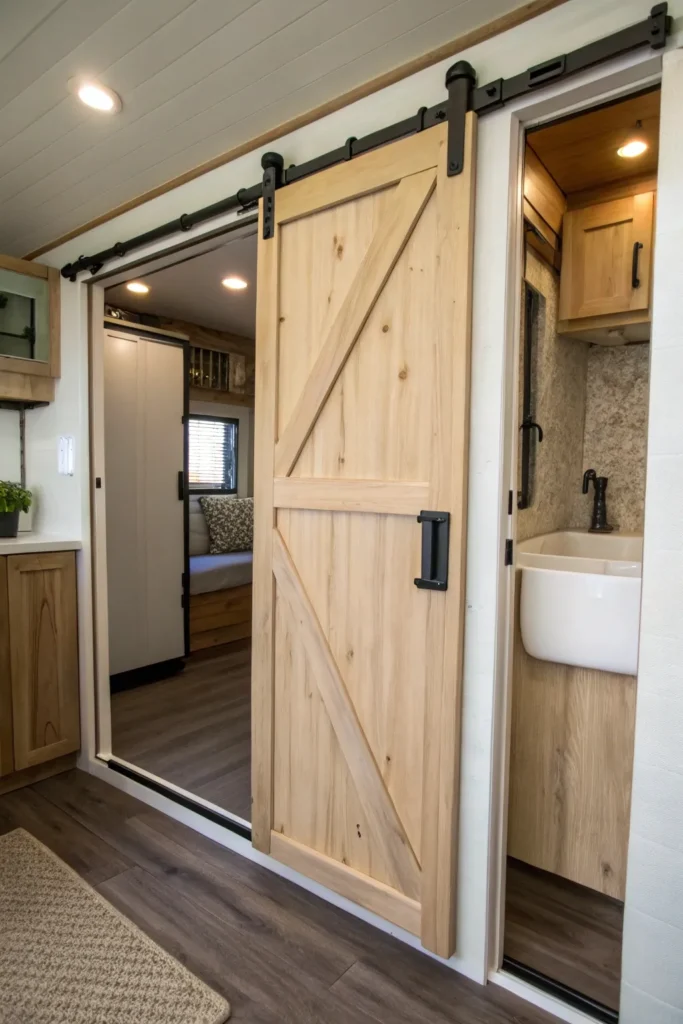
Traditional swinging doors eat up floor space. Sliding barn doors offer a stylish solution for privacy.
How to: Install a barn door track system and choose a lightweight door panel. Use a locking latch or magnet to keep the door secure during travel. Paint or stain it to match your interior theme.
Best for: Bathrooms, closets, or separating zones in a studio-style camper.
Drawback: May rattle or shift if not secured properly while on the road.
Opt for Built-In Benches with Storage
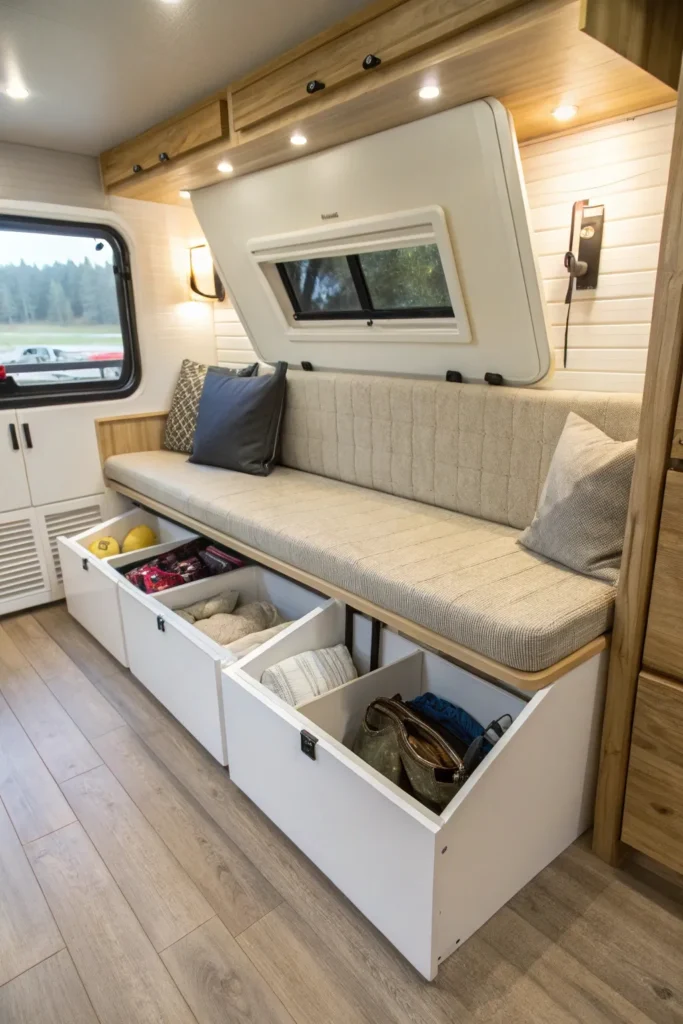
A bench can double as seating and a storage chest—perfect for gear, linens, or pet supplies.
Steps: Construct a box frame with a hinged or lift-up top. Line the inside with storage bins or soft bags. Add a padded cushion for comfort and style.
Why it’s helpful: Streamlines your layout while hiding clutter.
Pro tip: Use washable or outdoor-rated fabrics for long-lasting upholstery.
Use a Murphy Bed or Wall-Bed
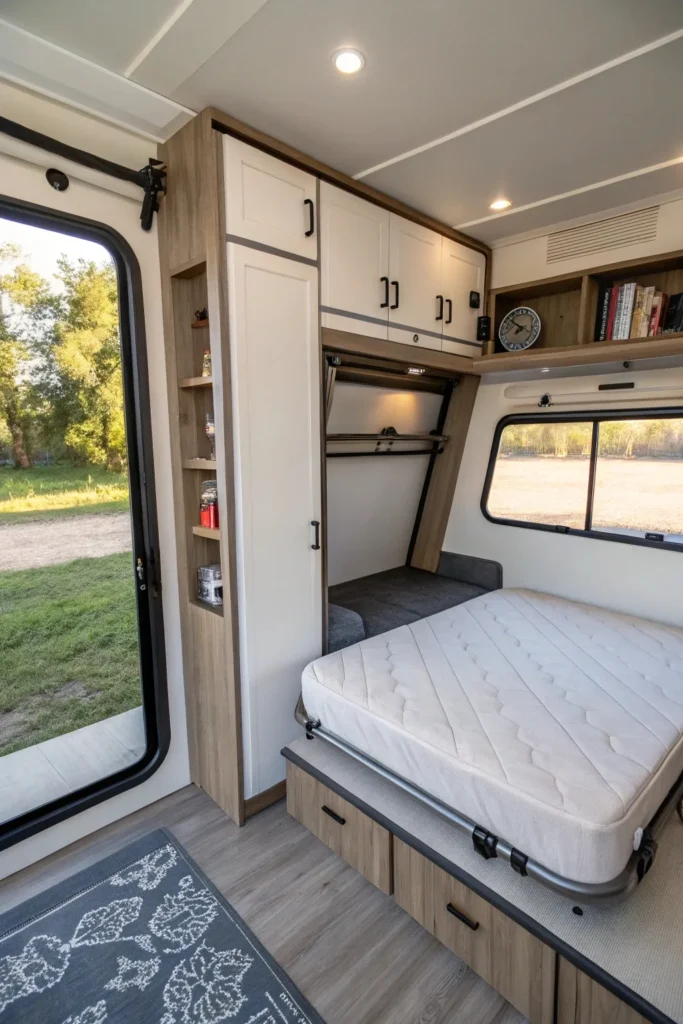
Why try this? It lets you reclaim the room when you’re not sleeping—ideal for flexible daytime use.
How-to: Install a wall-mounted frame and fold-up mattress system. Secure the frame with strong anchors and locking hardware. Add shelving or a decorative panel to disguise the bed when stored.
Best for: Campers who host guests or want a separate “living room” feel during the day.
Con: More involved to build—best for those confident in carpentry or with a pro’s help.
Install Solar Panels on the Roof
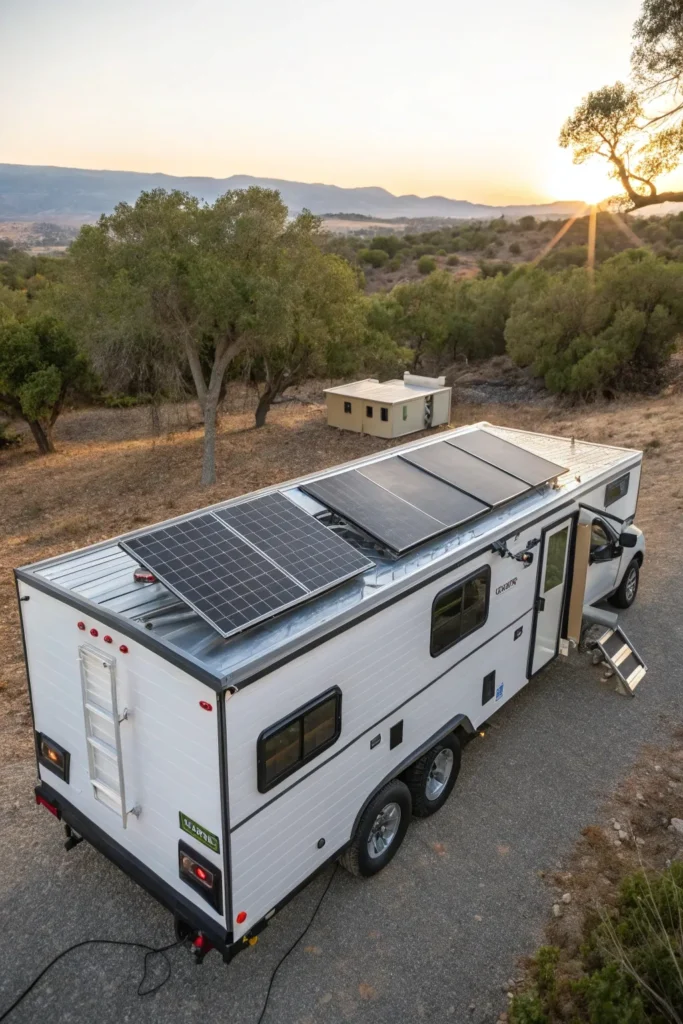
Solar power reduces your reliance on hookups and lets you stay off-grid longer.
Benefits: Silent and sustainable energy source. Powers lights, fans, and appliances. Reduces need for gas generators.
Steps: Install lightweight flexible or rigid panels on the roof. Connect to a solar charge controller and battery bank. Add an inverter to power AC devices.
Best for: Boondockers, off-grid adventurers, and eco-conscious travelers.
Pro tip: Add a battery monitor system to track energy use efficiently.
Build a Wet Bath to Save Space

A compact bathroom where everything gets wet (shower, sink, toilet) minimizes square footage without sacrificing function.
How to: Use waterproof panels for walls and floors. Install a showerhead, drain, and RV toilet in one space. Ventilate well to avoid moisture build-up.
Why it’s great: Combines all bathroom functions into one efficient footprint.
Downside: Everything gets wet, so plan for drying space or quick-dry materials.
Add a Pop-Up Roof Section
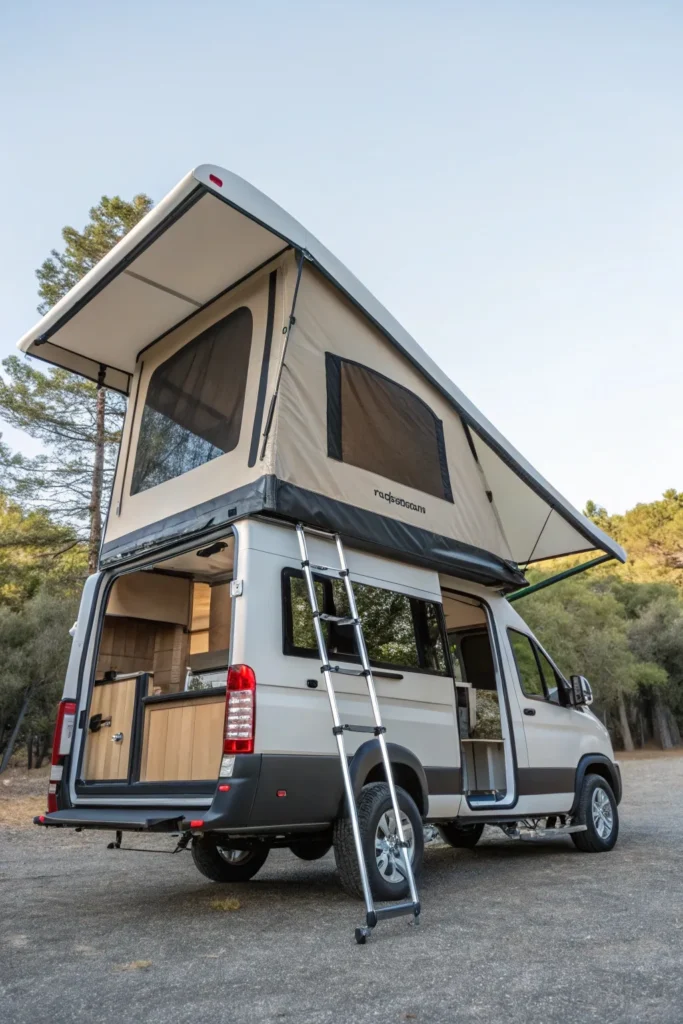
Pop-up roofs give added headroom and sometimes extra sleeping space, without increasing road height.
Implementation: Install a liftable roof with canvas sides. Use gas struts or a crank system for easy setup. Add windows for airflow and visibility.
Ideal for: Campers who want to stand upright, stretch out, or add a sleeping loft.
Con: Less insulation than solid walls—may need extra layers in winter.
Build an Outdoor Kitchen Pull-Out
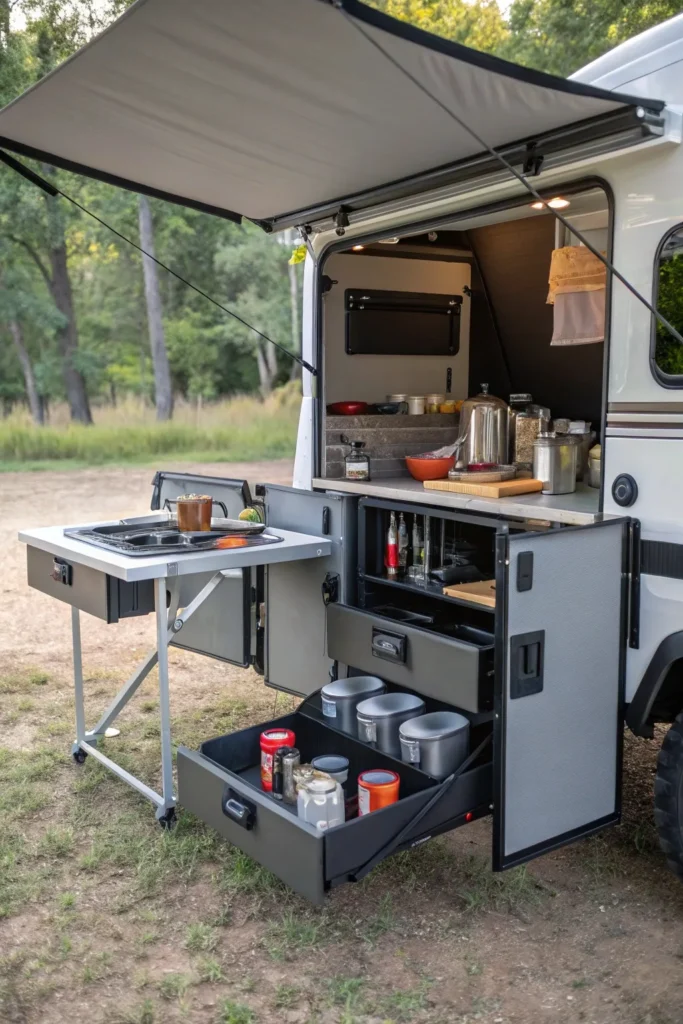
Cooking outside keeps your camper interior cleaner and cooler—plus it’s fun to cook in nature.
Steps: Use a drawer slide or hinged tray for a portable stove or grill. Add a folding table or countertop extender for prep space. Store utensils and dishware in nearby outdoor compartments.
Who it’s for: Campers who love grilling or tailgate-style cooking.
Pro tip: Set up near your awning and use hanging organizers for condiments and tools.
Use Stackable Bins or Labeled Storage Boxes
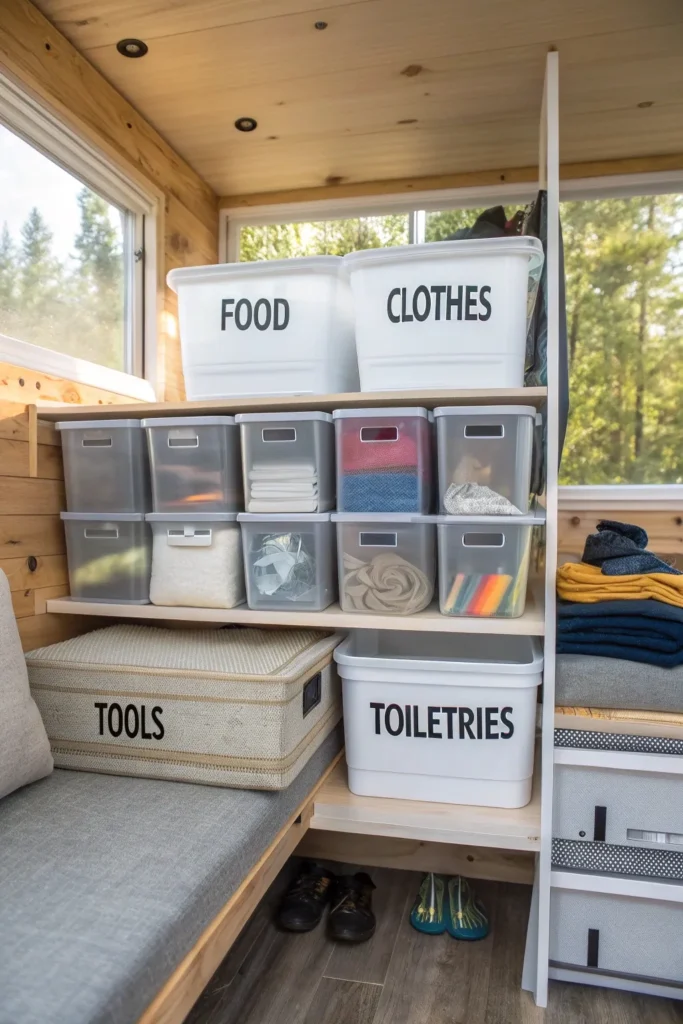
Keeping your gear sorted in labeled bins makes cleanup and packing easier on every trip.
How to: Use stackable clear bins, fabric cubes, or collapsible baskets. Label each one clearly for food, clothes, tools, or toiletries. Store them in cabinets, under benches, or on shelves.
Why it helps: Prevents chaos and makes use of every inch.
Best for: Families or anyone who packs different gear for different trips.
Upgrade to LED Lighting Throughout
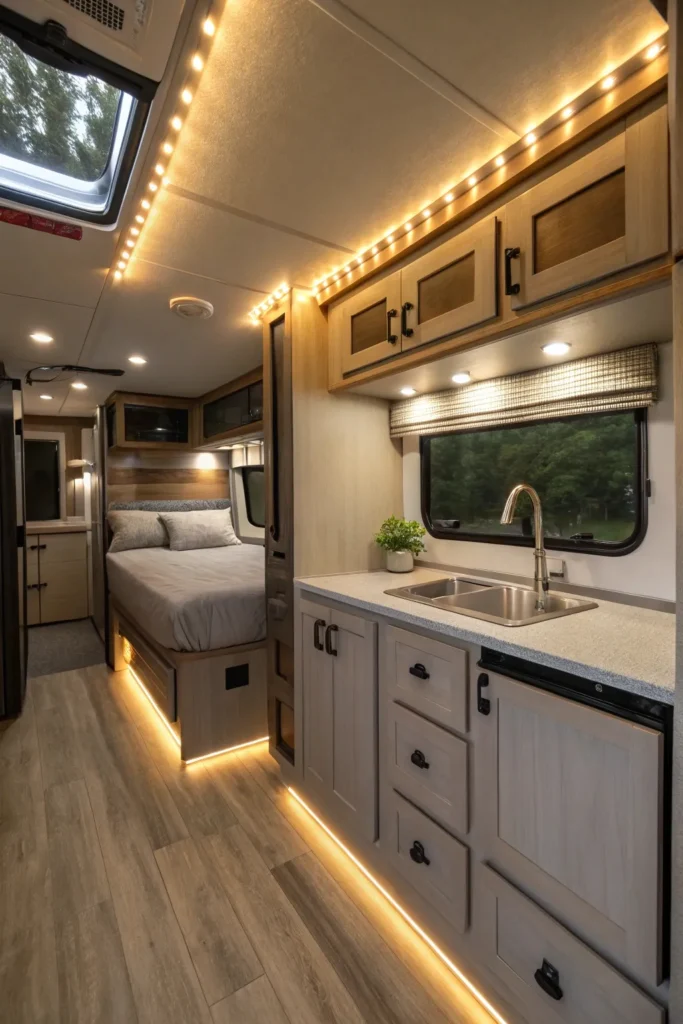
Swapping old lights for modern LED ones saves energy and instantly improves aesthetics.
Benefits: LEDs use far less power and produce less heat. They come in all shapes—puck lights, strip lights, sconces. Dimmable and color-adjustable options available.
Steps: Replace existing bulbs with LED equivalents. Install new light fixtures with soft, warm white light (around 2700K). Use adhesive strip lights under cabinets or inside shelves.
Styling tip: Use copper or matte black fixtures for a boutique hotel feel in your camper.
With these 16 renovation ideas, you have everything you need to transform your camper into a comfortable, functional, and stylish mobile home. Start with the modifications that address your biggest needs and gradually work through the list.
Remember, the best camper renovation is one that matches your travel style and makes your adventures more enjoyable. Take your time with each project, prioritize safety and durability, and don’t be afraid to customize these ideas to fit your specific space and budget.

